


Covering your car with vinyl can give it a whole new appearance and it won’t be as expensive or permanent as a fresh paint job. But before you start wrapping your car, you should ask yourself: how much vinyl is needed? If you don’t plan for enough materials, you may experience delays and waste, but if you order too much, you’ll spend more than you should. This guide will explain the details of vinyl estimation, so you can handle your project with confidence and accuracy. It’s not only about cutting costs when you get this right. The goal is to create a finish that matches your ideas.
Understanding Basic Vinyl Needs by Car Size
The first thing to do when planning a car wrap is to figure out how much vinyl you’ll need by looking at the size of the vehicle. It’s like planning a trip before you start, you need to know the general route before you can find the exact location. They are important to look at first, as they give you a basic idea of the resources needed. These are only general suggestions. The design and features of your car will determine the amount of wrap you will need.
Here’s a handy reference table for full car wraps:
| Car Type | Approximate Vinyl Needed (Feet) | Approximate Vinyl Needed (Meters) |
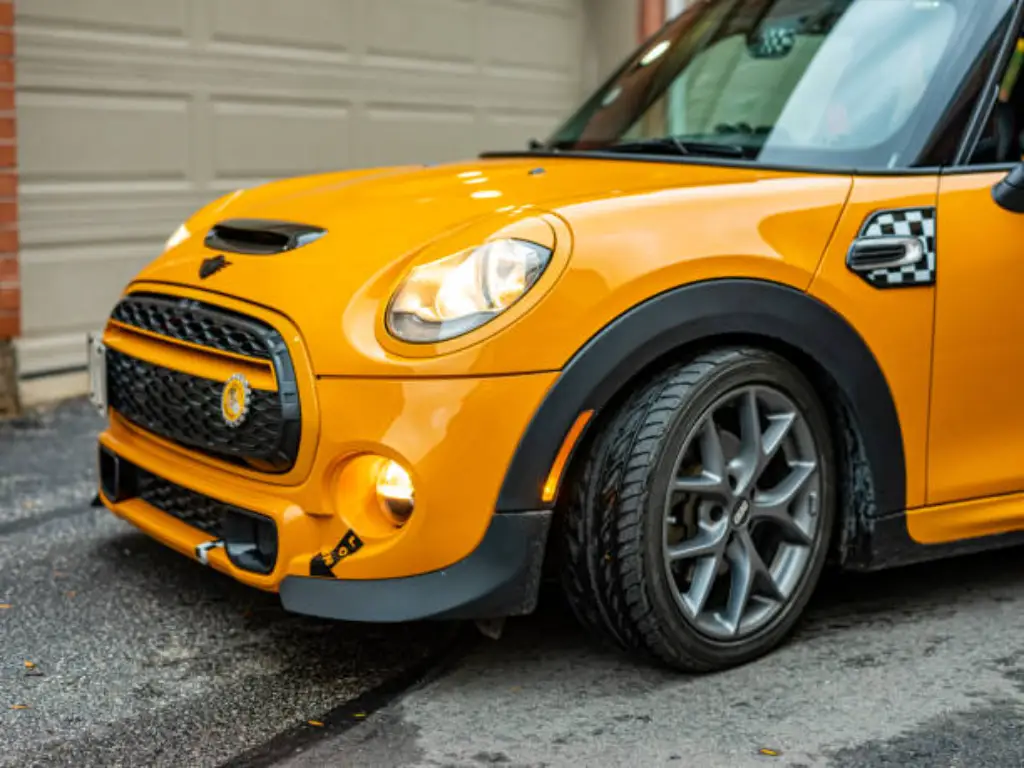
| Small Cars | 50-60 | 15-18 |
| (e.g., Mini Cooper, Mazda Miata) | ||
| Compact Cars | 55-65 | 17-20 |
| (e.g., Honda Civic, Toyota Corolla) | ||
| Mid-Size Sedans | 60-70 | 18-21 |
| (e.g., Honda Accord, Toyota Camry) | ||
| Full-Size Sedans | 65-75 | 20-23 |
| (e.g., BMW 5 Series, Mercedes E-Class) | ||
| Small SUVs/Crossovers | 65-75 | 20-23 |
| (e.g., Honda CR-V, Toyota RAV4) | ||
| Mid-Size SUVs | 70-80 | 21-24 |
| (e.g., Jeep Grand Cherokee, Ford Explorer) | ||
| Full-Size SUVs | 75-85 | 23-26 |
| (e.g., Chevrolet Tahoe, Cadillac Escalade) | ||
| Pickup Trucks (Standard Cab) | 70-80 | 21-24 |
| (e.g., Ford F-150 (regular cab)) | ||
| Pickup Trucks (Crew Cab/Long Bed) | 85-100+ | 26-30+ |
| (e.g., Ford F-150 (crew cab), Ram 2500) | ||
| Vans/Minivans | 80-100+ | 24-30+ |
| (e.g., Honda Odyssey, Ford Transit Connect) |
Please note: This table provides general estimates. Actual requirements may vary based on specific vehicle dimensions, body contours, and installer experience. Remember, these are just starting points, and various factors can influence the precise quantity you’ll ultimately need.
These numbers serve as your initial blueprint. They give you a baseline understanding of the scope of your project. For instance, a compact car will naturally require less material than a large SUV, influencing both your budget and the time commitment. It’s a critical first filter before you deep dive into precise measurements.
Calculating Your Car’s Exact Vinyl Dimensions
While the general numbers are useful, you need to measure carefully to get the wrap right. Consider this process like making a suit; a standard size may do, but a custom fit will look better. If you calculate accurately, you will not waste material and will have enough for every bend in the project. At this point, you turn your idea into a real plan to prevent running out of materials in the middle of the project. This way of working helps keep car wrap costs under control.
The most common and effective method for calculating your vehicle’s vinyl needs involves a simple formula and careful measurement:
- Measure the Length: Measure your vehicle by going from the front bumper to the rear bumper. Take the longest measurement you can.
- Multiply by Three (for sides and top): For the sides and top, multiply the total length by three. This covers both front and back of the vehicle, as well as the tops of the hood, roof and trunk. If your car is 15 feet long, you’d begin with 15 x 3 which equals 45 feet.
- Add for Bumpers and Overlaps: For bumpers and overlaps, additional material is needed because of the curves, holes and the requirement for a smooth wrap. Increase your total by 5 to 15 feet (1.5 to 4.5 meters). The amount you need will depend on how detailed your car is and how well you can paint. For cars with strong curves or if you’re just starting, use more oil.
- Consider Vinyl Roll Width: Keep in mind Vinyl Roll Width: Most vinyl wrap is sold in rolls that are 60 inches (5 feet or 1.52 meters) wide. Because of this standard, panels are cut to the right size and you don’t have to worry about seams when covering your car with vinyl. The length you calculate should be divided by the roll width and the result should be enough to cover the area you need.
- Round Up to the Nearest Roll Size: Choose the Next Higher Roll Size: Vinyl is most often available in standard roll lengths (such as 25 ft, 50 ft or 75 ft). Always increase your total to the closest roll size that is available. Being a little over than being a little short is always better.
Example Calculation:
Let’s say you have a mid-size sedan that is 15 feet (4.57 meters) long.
- Base Length: 15 ft
- Multiply by Three: 15 ft * 3 = 45 ft
- Add for Bumpers/Mistakes (assuming moderate complexity): +10 ft
- Total Estimated Needed: 55 feet
Since vinyl is usually sold in rolls of 50 feet or 75 feet, you should get a 75-foot roll to make sure you don’t run out. A lot of suppliers have a vinyl wrap calculator on their websites to make this process easier by considering the usual roll sizes.
Keep in mind that every little mistake can add up on big pieces of material for the whole vehicle. Be careful with your measurements and if you’re not sure, check them twice. If you plan carefully, you will find the actual wrapping process much less stressful.
Why Extra Vinyl is Non-Negotiable
In the world of car wrapping, having more vinyl than you need is considered a must. Suppose you were building a house without extra nails; you’d have to keep going to the hardware store. This is also true for this situation. The buffer helps you handle the issues that might come up during installation, making the process easier.
- Mistakes Happen: Mistakes Are Common: For those who enjoy wrapping gifts by themselves, mistakes are normal as you learn. Miscuts, bubbles, creases or tears can make a part of the vinyl unusable. With additional material, you can fix a scene without stopping the entire production.
- Complex Curves and Contours: Cars are not simple, flat shapes. The detailed shapes, deep dips and sharp lines in their designs call for stretching, heating and careful handling of the vinyl. Since you need to tuck extra material into the edges and curves, this process usually uses more material than a simple flat surface.
- Trimming and Overlap: For a perfect finish, installers often add extra material to the panels and then trim it precisely. It guarantees that edges are clean and there are no unsightly gaps. You should keep in mind that the waste from trimming will be part of your overall cost.
- Learning Curve for Beginners:If you’re just starting with car wrapping, you may not get the results you want at first. As you get better at your technique, you’ll probably use more material. For those working in the industry, it is common to add 10-20% to the price. If you are just starting, you should plan to add an extra 25-30% or even 50% to your estimated expenses. It gives you the space you need to make mistakes and learn from them.
- Future Repairs: Even after a perfect wrap, small damage from road debris or accidents might still happen. If you have leftover vinyl from your first roll, you can easily patch a small area and keep the color and texture the same as the rest of the wrap. It usually saves money compared to buying a new, smaller roll or covering the whole panel again.
Think of the extra vinyl as an insurance policy for your project. It’s a small upfront cost that can prevent larger expenses and immense frustration down the line. Don’t skimp on this vital buffer.
Special Considerations: Partial Wraps & Details
Sometimes, a project only requires a few changes to the vehicle. At times, just a partial wrap or some detailed work is enough to get the look or protection you want. The materials for these projects are not the same as those used for a full wrap. The wrap you want to achieve determines the material you should buy.
Here’s a breakdown of common partial wrap needs:
- Hood Wrap: A hood wrap usually needs 5-8 feet (1.5-2.4 meters) of vinyl, depending on the hood’s size and any vents or scoops it has.
- Roof Wrap: Like a hood, most sedans and coupes require 5-8 feet (1.5-2.4 meters) of roof space. If you have a large SUV or van, you may need up to 10-12 feet (3-3.6 meters) of space.
- Trunk/Tailgate Wrap: For most cars, a wrap on the trunk or tailgate should measure 5-7 feet (1.5-2.1 meters). Sometimes, pickup truck tailgates require a little more effort.
- Door Sills/Door Jambs: Door Sills/Door Jambs: These areas may seem small, but they can add a lot to the total cost. Allow for about 2-3 feet (0.6-0.9 meters) of space for each door.
- Side Mirrors: Because of their curved shape, you should plan for 1-2 feet (0.3-0.6 meters) per mirror to cover the stretching and tucking.
- Window Trim/Chrome Delete: You need thin strips for this type of blackout. Although the total length may be long (e.g., 20-30 feet or 6-9 meters), the actual area is not large, so a narrow roll or custom-cut strips are usually used.
- Interior Trim: The amount of trim you need will determine if you use a few feet or a full roll, depending on where you are trimming.
- Fenders: The length needed for fenders depends on the vehicle and the design, so plan for 4-6 feet (1.2-1.8 meters) per fender.
When doing a partial wrap, you must measure the exact panels you want to cover. You should plan for a small amount (10-20%) to cover mistakes and trimming, but the total amount you need will be much less than a full wrap. Because these applications are precise, it is very important to measure carefully.
Vinyl Type & Quality: Does It Affect Quantity?
Your choice of vinyl and its quality can affect the way your wrap looks, its durability and even the amount you will need. It’s similar to picking between low-quality, stiff fabric and high-quality, flexible material for a garment. The flexible one is simpler to work with and wastes less. The film’s quality will determine how long your wrap will last.
Here’s how different vinyl factors into your quantity needs:
- Cast Vinyl vs. Calendered Vinyl:
- Cast Vinyl (Premium): Cast Vinyl (Premium) is the best choice, generally used when covering the whole car. The film is made by pouring liquid PVC over a sheet which creates a thin, steady and flexible material. The material’s good memory and ability to stretch make it easier to lay into detailed curves and recesses without worrying about bubbling or lifting. Avery Dennison is recognized for producing top-quality cast films. Because it is easy to use, experienced installers often make fewer mistakes which reduces the amount of waste.
- Calendered Vinyl (Economical): This film is made by rolling PVC through heated rollers and is usually thicker, less flexible and tends to return to its original flat shape. Although it’s cheaper, it is harder to shape on complicated curves and tends to shrink as time goes on. For areas that are hard to work with, a DIY installer could end up using more calendered vinyl and still not get the perfect fit, making the initial savings less important.
- Film Thickness: Thinner films (as found in many cast wraps) may be more flexible and simpler to use on curved areas, decreasing the risk of the material tiring out from too much stretching. A thicker film may be more scratch-resistant, but it can be trickier to get it applied evenly.
- Air-Release Channels: Most high-quality vinyl films are made with air-release channels in their adhesive. The small channels make it easy for trapped air to escape which lowers the risk of bubbles and gives you a smoother finish. Using this feature means you don’t have to pull up and re-apply sections which saves you material.
- Different Finishes: Finishes: Even though the finish doesn’t affect the actual amount of paint, some finishes are easier to apply. In this way, a matte or satin finish is better at hiding small issues and dust compared to a high-gloss finish which is very clear. With textured films, you may need to be extra careful with alignment which could slightly affect waste.
Selecting a good vinyl, especially cast film with air-release technology, can help you use less material because the installation process is smoother and less likely to cause expensive problems. It helps you avoid constantly moving or redoing parts which can quickly use up your materials.

Marketing Integration Point:
While vinyl wrap offers amazing aesthetic changes and some protection, its primary role is visual. For superior, long-lasting protection against scratches, rock chips, and environmental damage, consider Paint Protection Film (PPF). Like ClearPro’s advanced PPF, is specifically engineered for durability and self-healing properties, providing an invisible shield for your car’s original paint. Unlike vinyl, which is mainly for color change, PPF is a robust guardian. If ultimate paint preservation is your goal, explore the benefits of ClearPro PPF at https://www.clearpro.com/. It’s a different kind of investment in your car’s future.

DIY vs. Pro: Impact on Vinyl Usage
If you decide to wrap your car yourself or hire someone, the amount of wrap you buy will be different. It’s similar to baking a fancy cake: a professional might get the recipe right, but a beginner might add more flour to get the hang of it. The more you know, the less waste you create.
- For the DIY Enthusiast: If you are new to car wrapping, you should expect to learn a lot at the beginning. It’s almost certain that you’ll make mistakes and each one usually requires you to cut and waste a piece of vinyl. You might have to repeat some parts, since the material may be stretched or the cuts are not aligned. For this reason, DIYers should buy at least 25-30% more vinyl than the amount they need. Experienced DIYers sometimes advise adding up to 50% more for vehicles that are hard to wrap or for those having their first full wrap. Having extra food is not a waste. It helps you learn and protects you from running out. If you don’t have a buffer, a small mistake could stop your project, require you to order new vinyl and make you wait for it to arrive, wasting both time and extra money on shipping.
- For the Professional Installer: Experienced professionals have gained a lot of experience through many installations. They are equipped with the right information, equipment and techniques to reduce waste. They are skilled in stretching, heating and trimming vinyl in the most efficient way. Most professionals find that an extra 10-20% of vinyl is adequate to handle small flaws, detailed body lines and normal trimming. Because they are efficient, less material goes to waste which saves you money.
DIY may be cheaper for labor, but you often end up spending more on materials because you are learning as you go. Consider this cost when you are deciding if you or a professional should handle the project. For those who want to save money by being precise and using less material, hiring a professional may be the better option.
Essential Tools & Supplies for Wrapping Success
It is just as important to have the right tools as it is to have plenty of vinyl. If you tried to paint a masterpiece with your fingers alone, it would look messy. Using the right tools allows you to control the vinyl better, reduce mistakes and use all the material. They aren’t just decorations; they help you wrap better and faster.
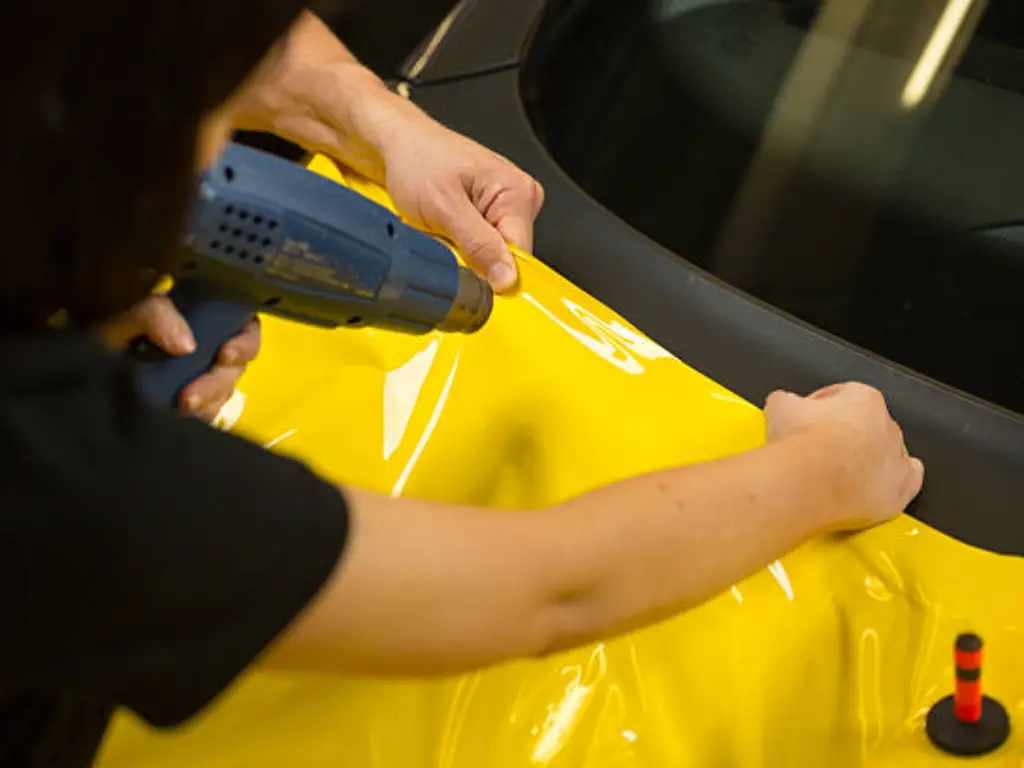
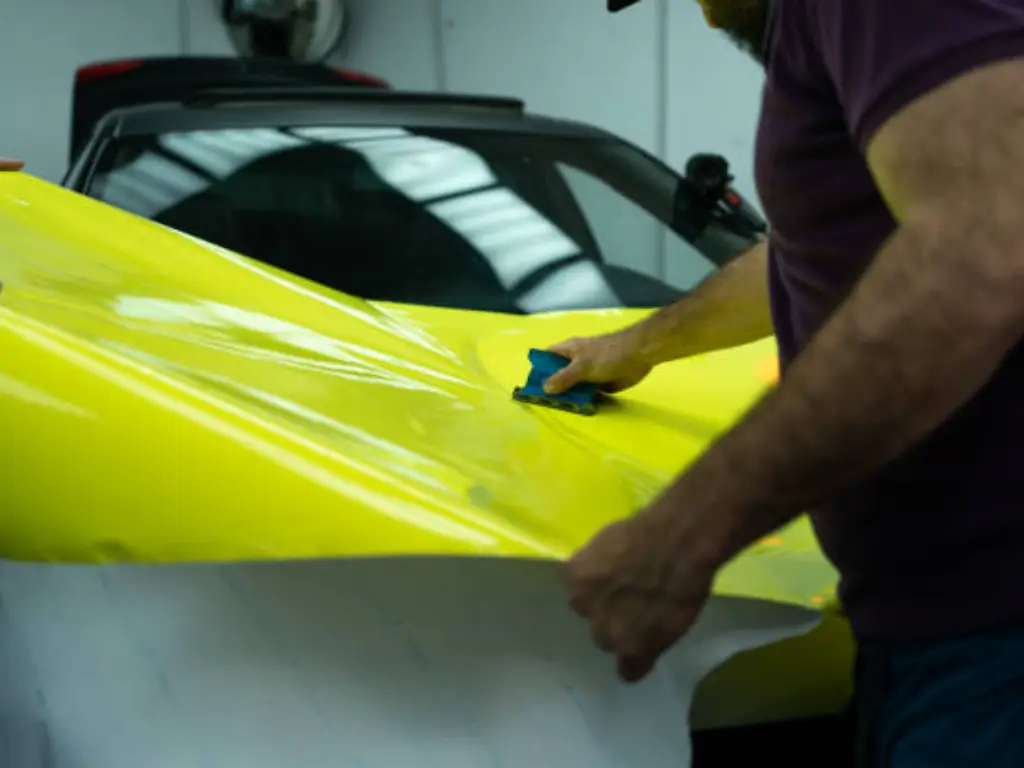
- Heat Gun: It is likely the most important tool you will use. A heat gun makes the vinyl flexible so that it can be shaped around curves and dips. When the vinyl is heated correctly, it won’t stretch too much and will be flat which helps avoid air bubbles and creases. When you use it properly, you waste less film because you can put it where you want it.
- Squeegees: Squeegees are available in different sizes and firmnesses and they are used to smooth vinyl by pushing out any air bubbles or wrinkles. Using the proper squeegee and process will result in a smooth finish, so you won’t need to lift and reapply areas where air is trapped.
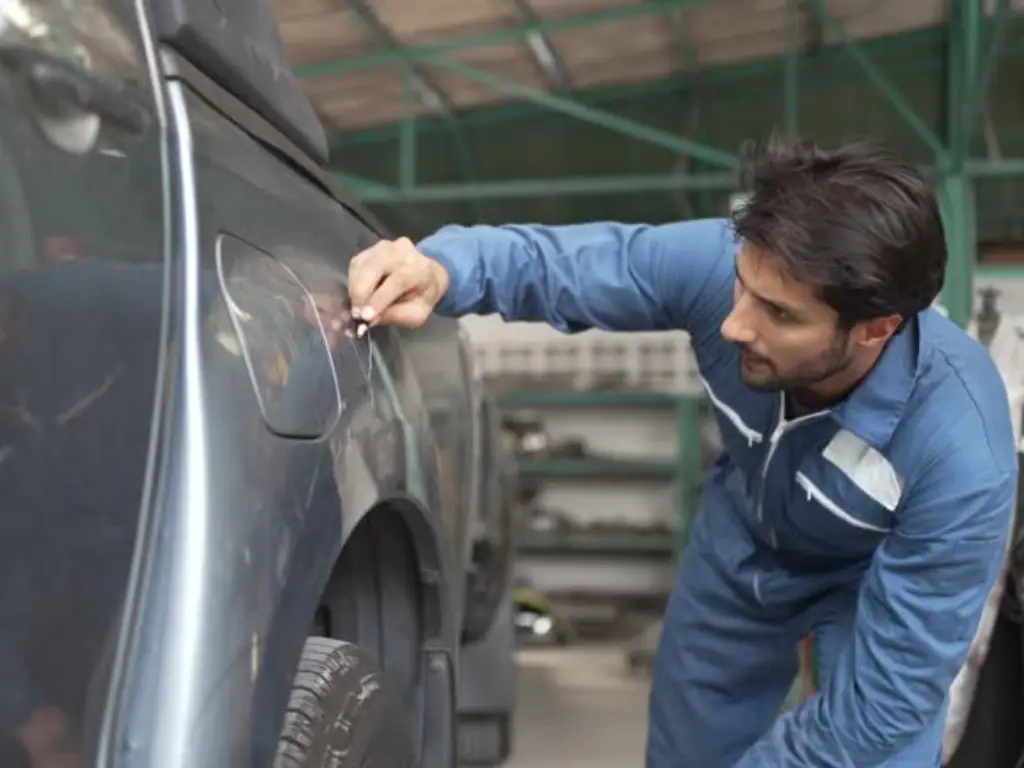
- Cutting Tools (Knives/Blades): Knives and Blades: It is very important to have precise cutting tools. A craft knife with snap-off blades or a specialized wrap tool ensures that your edges are smooth and that you don’t waste any paper. If your blades are not sharp, they could rip the vinyl, causing you to waste it.
- Magnets: They are used to hold the vinyl on the car until it is applied. This makes it much easier to place large sheets correctly, so the vinyl doesn’t move and you don’t have to keep repositioning it which can damage the adhesive or stretch the film.
- Measuring Tape: You must have a measuring tape to ensure your pieces are cut accurately. Using a flexible tape measure is the best way to measure curves.
- Surface Preparation Cleaners: Before you put on the vinyl, the car’s surface should be spotless. IPA and surface prep cleaners are used to remove any wax, oil or dirt that might stop the adhesive from working properly. If the surface is clean, the paint will stick well and you won’t have to redo any parts that peel or bubble.
- Microfiber Cloths: To clean and dry the surface without leaving any lint.
- Gloves: Lint-free gloves help prevent the vinyl’s adhesive from getting dirty with oils on your hands and keep your work clean.
- Snitty (Cutting Tape): With Snitty (Cutting Tape), you can cut the vinyl on the vehicle without harming the paint. It is great for making accurate cuts around panels and edges which helps save materials by making cleaner cuts.
Investing in these tools isn’t an extravagance. It’s a necessity that ultimately saves you material, time, and frustration, making your vinyl wrapping project a much smoother and more successful endeavor.
Final Thoughts: Wrap Smart, Drive Proud
Starting a car wrap project, no matter how much is done, is a fun way to make your vehicle stand out. But the key to making this work is understanding the correct amount of vinyl needed to wrap a car. It’s not only about the number. It’s about knowing the different factors, expecting difficulties and having the knowledge to decide wisely.
All the steps, starting with rough estimates and ending with precise measurements, help make the process easier. Having a little extra money is important as it protects you from surprises. Keep in mind that the type of vinyl you select can change your application process and how much material you need. The right tools can help you turn a difficult job into something you can handle and even find fun.
If you follow these tips, you’ll be able to determine your vinyl needs correctly and work through the wrapping process with more confidence and speed. Smart wrapping, proud driving and you’ll love the amazing new look of your car!