


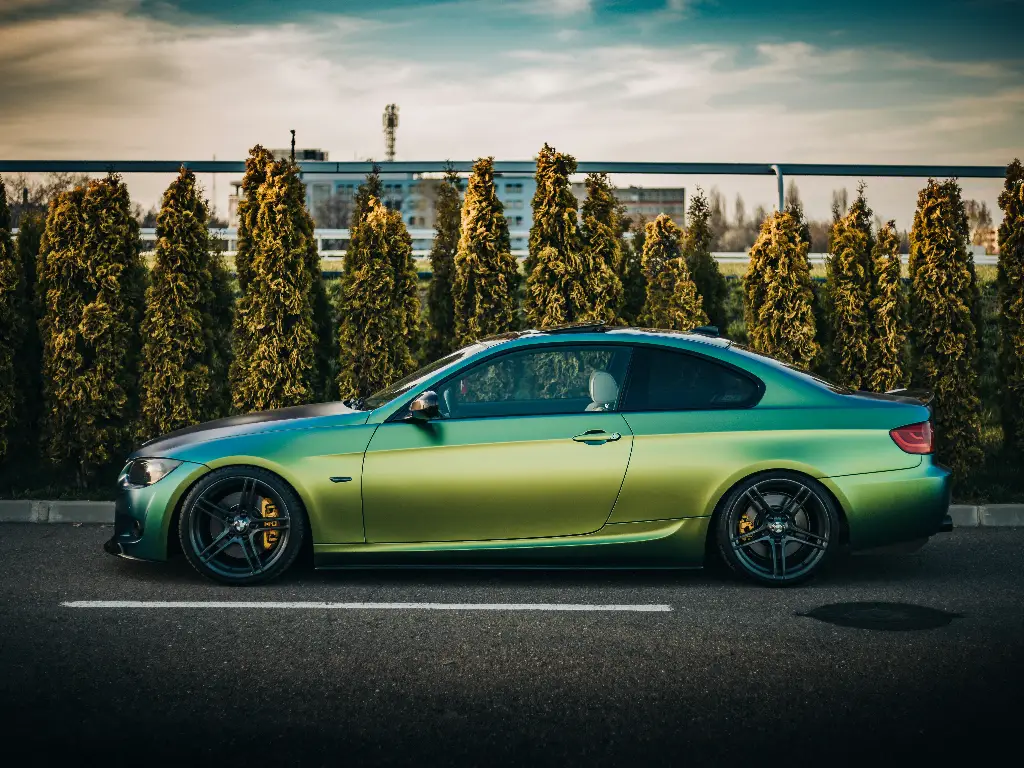
Time is the most misconceived variable in the automotive aftermarket industry. To car owners, the anticipation of car wrapping is usually in line with the pace of a mere sticker application. To the professionals, however, the wrapping process is a complicated manufacturing endeavor used on a three-dimensional and dynamic surface. The main source of friction in the industry is the difference between the client’s expectations (a couple of hours) and the technical reality (days).
A vehicle wrap process is not just a cosmetic modification; it is an engineering job involving dismantling, surface chemistry control, accurate wrap application, and curing. To give a realistic time estimate to the question of how long it takes, we have to go beyond rough guesses and examine the car wrapping process, the size of the vehicle, and the importance of material science.
The Short Answer: Estimated Timeframes by Vehicle Size
If we assume a standard workflow involving a two-person professional team, a controlled environment, and no significant paint correction required, we can establish a baseline time frame. Note that these estimates represent active labor and curing time combined.
The amount of time required heavily depends on the model of your vehicle and the type of wrap chosen. Naturally, larger vehicles will require additional time compared to smaller vehicles. The following table categorizes the time investment required:
| Vehicle Category | Representative Models | Estimated Turnaround Time | Primary Time Factor |
| Compact / Sedan | Tesla Model 3, BMW 3 Series, Honda Civic | 3 – 4 Days | Standard panel sizes; moderate disassembly required. |
| Small SUV / Crossover | Porsche Macan, Toyota RAV4, Ford Escape | 4 – 5 Days | Increased surface area; additional trim removal often necessary. |
| Large SUV / Truck | Range Rover, Ford F-150, Cadillac Escalade | 5 – 7 Days | Massive surface area; roof accessibility issues; complex bumper geometries. |
| Supercar / Exotic | Lamborghini Huracán, Ferrari F8, McLaren 720S | 5 – 7+ Days | Extreme geometric complexity (compound curves); high-stakes disassembly. |
| Partial Wrap | Roof, Hood, or Chrome Delete | 1 – 2 Days | Lower surface area, but curing time remains constant for edges. |
Note: Any provider quoting significantly less than these baselines (e.g., “Same Day Service”) is likely bypassing critical preparatory or finishing protocols, which will be discussed in subsequent sections.
Stage-by-Stage Breakdown: Where the Time Goes
To understand the duration, one must analyze the resource allocation across the three distinct phases of wrap installation. Contrary to popular belief, the actual laying of vinyl film or Paint Protection Film (PPF) accounts for less than half of the total process.
Phase 1: Preparation and Decontamination (Approx. 40% of Time)
This is the most critical stage. Whether you are applying vinyl car wraps or clear film, success relies on mechanical and chemical adhesion. The vehicle condition must be impeccable; surface preparation is key to ensuring the adhesive film bonds correctly to the original paint.
- Deep Cleaning: The car is washed in several stages to eliminate the dirt on the surface.
- Decontamination: Technicians apply clay bars and special chemical agents to iron fallout, tar, and sap, which cannot be removed by a regular wash.
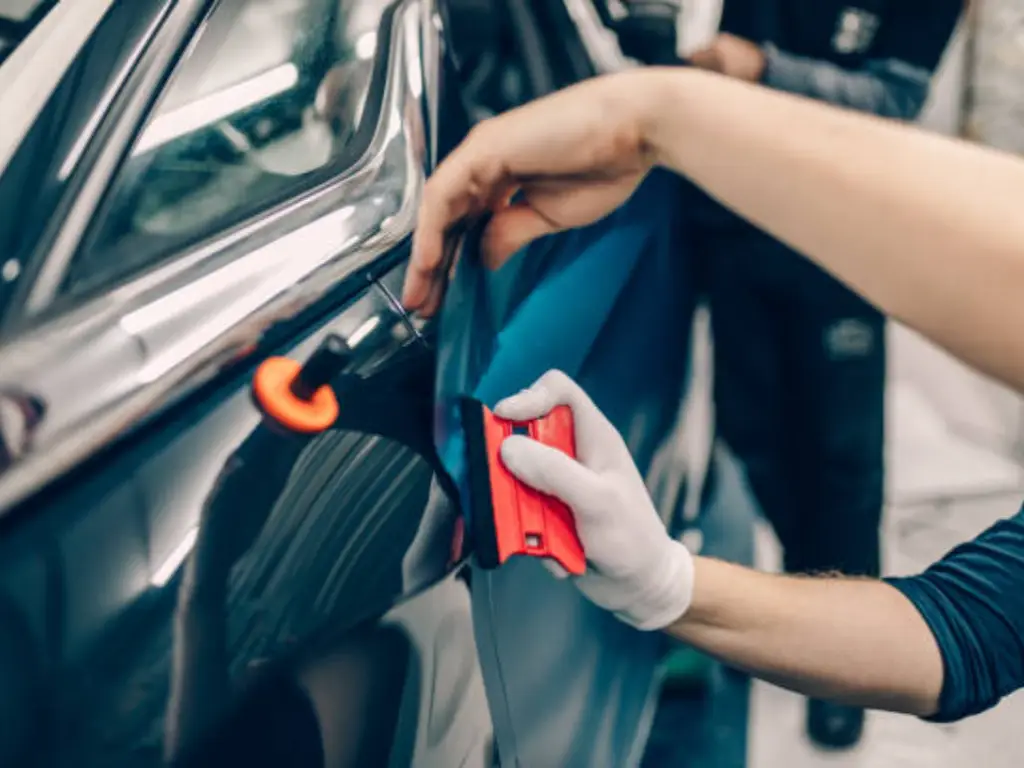
- Disassembly: The film should be encircling the sides of panels in order to attain a smooth paint-like finish. This requires the door handles, side mirrors, headlights, taillights, and front and rear bumpers to be removed. The disassembly process must be systematically arranged so that all the hardware is listed to be reassembled.
- Degreasing: Wipe all the square inches, especially concealed corners and crevices, with isopropyl alcohol or proprietary prep solutions to remove oils and waxes.
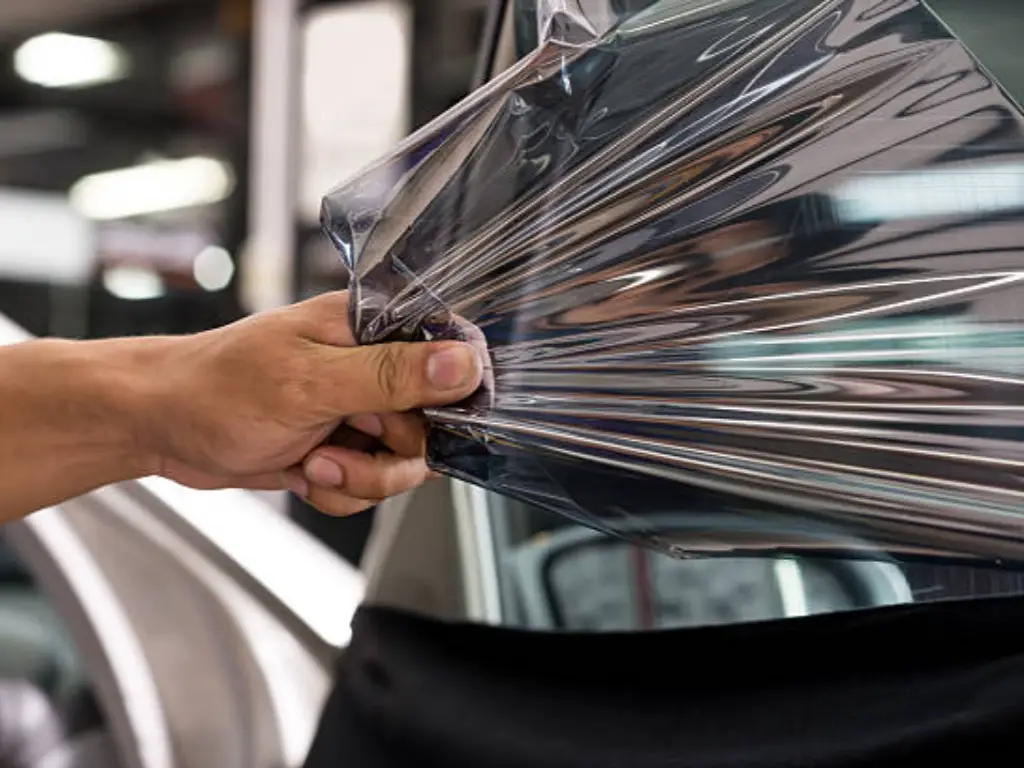
Phase 2: Installation (Approx. 40% of Time)
It is the stage of physical implementation of the material.
- Glassing: This is done by placing the film on the panel and the tension is spread evenly.
- Squeegeeing: Air and fluid (in the case of PPF) are removed to make the adhesive active.
- Trimming: Unnecessary content is removed. In luxury stores, it is done with a very high degree of accuracy to prevent cutting the paint, or with knifeless tape systems.
- Corner Work: This distinguishes a good installer from an amateur. Corners need heat and specific tension methods to ensure the perfect fit.
Phase 3: Finalizing and Reassembling (Approx. 20% of Time)
The car does not look wrapped and the job is not complete.
- Post-Heating: Cast vinyl does have a memory. When it is extended, it desires to go back to its original form. To fix the film in a new form, technicians are required to heat the film to certain temperatures (usually about 90 o C or 194 F in the case of vinyl) to kill this memory. This helps to avoid future lifting.
- Reassembly: Bumpers, lights and handles are re-assembled. The gaps between the panels should be inspected to make sure the thickness of the film added does not interfere.
- Final Inspection: The car is inspected in special lighting to detect the presence of micro-bubbles or defects.
Key Factors That Extend or Shorten Installation Time
The baselines provided above are subject to variance based on three primary factors.
- Geometric Complexity
Size is not the only determinant of time; topology is equally important. A Jeep Wrangler, despite being a large vehicle, consists mostly of flat, planar surfaces, making the film application relatively straightforward. Conversely, a McLaren or a modern Supra features deep recesses, aggressive air intakes, and compound curves. These geometries require the installer to manage the “stretch limit” of the material carefully. Over-stretching leads to discoloration or failure. Therefore, a smaller car with complex geometry often takes longer to wrap than a larger, boxy vehicle.
- Paint Condition
A wrap is not a solution for bad paint; it will magnify surface imperfections. If the clear coat has rock chips, deep scratches, or failing lacquer (peeling), these issues must be addressed before wrapping.
- Correction: Sanding down chips or polishing out scratches adds hours or days to the timeline.
- Risk: If the clear coat is compromised, the adhesive of the wrap may pull the paint off during repositioning. Installers must test and inspect doubtful surfaces, adding time to the consultation and prep phase.
- The Hidden Time Sink: Old Wrap Removal
If the vehicle currently has a wrap, the timeline becomes volatile. Removal time is dictated by the quality of the previous material and how long it has been on the car.
- Clean Removal: High-quality film removed within its lifespan may come off in 4 hours.
- Difficult Removal: Old, baked-on, or low-quality film can crack and delaminate, leaving the adhesive layer behind. Removing adhesive residue is a chemical-heavy, manual process that can easily add 1 to 2 full days of labor to the project.
Traditional Vinyl vs. Colored PPF: The Material Evolution
The industry is currently undergoing a shift from traditional PVC-based Vinyl wraps to TPU-based Colored Paint Protection Film (Colored PPF). While both change the vehicle’s appearance, their installation physics—and thus their timelines—differ significantly.
Traditional Vinyl Wrap:
- Method: Dry application.
- Characteristics: Thinner (3–4 mils) and relies on air-release channels.
- Time Implication: Generally faster to lay down initially but requires extensive post-heating to prevent lifting. The finish often suffers from a texture known as “orange peel,” which cannot be fixed.
Colored PPF (The Modern Standard):
- Method: Wet application (slip solution).
- Characteristics: Thicker (8+ mils), offering true impact protection and self-healing properties.
- Time Implication: Requires squeegeeing liquid and careful edge drying (similar to clear PPF). While this process may add roughly 10-15% to the installation time compared to a basic vinyl wrap, the trade-off is a surface finish that is indistinguishable from factory paint.
How High-Quality Film Reduces Installation Time and Risk
It is an economic fallacy to view material selection solely as a cost decision; it is a critical factor in installation efficiency and final finish quality.
Inferior films—whether vinyl or low-grade PPF—present mechanical resistance to the installer. They may tear under tension, discolor when stretched (whitening), or exhibit severe “orange peel” texture. In contrast, scientifically engineered films, such as ClearPro’s Colored and Clear PPF, are designed to optimize the workflow.
- The “Zero Orange Peel” Advantage: Traditional vinyl wraps are notorious for their wavy, textured finish. ClearPro utilizes exclusive Polyoptico™ coating technology, achieving a surface roughness (Ra) of ≤0.05µm. This delivers a 95 GU (Gloss Unit) finish that mirrors the depth of OEM paint. For the shop, this eliminates customer complaints about texture; for the owner, it justifies the installation time by providing a “paint-like” result that vinyl cannot achieve.
- Accelerated Application via Elongation: Applying colored film around complex curves often carries the risk of the color thinning or whitening. ClearPro’s proprietary formula offers a tensile elongation rate of >400%. Despite the substantial 8-mil thickness needed for protection, this elasticity allows the film to conform to complex geometries (like bumpers) without stress marks. This reduces the “fight” between the installer and the material, cutting down active labor hours.
- Precision Manufacturing: Dust is the enemy of any wrap. ClearPro manufactures its films in a Class 1000 clean room (pharmaceutical grade) within a 3,000m² facility. This ISO 9001 and IATF 16949 certified environment ensures every roll is pristine. Installers do not waste time removing embedded manufacturing defects, ensuring a smoother, faster delivery.
- Long-Term Stability: Efficiency extends to the ownership period. Backed by testing over 50,000 km in extreme environments, ClearPro films offer a 10-year warranty against yellowing, cracking, or delamination. Choosing a verified substrate mitigates the risk of future time loss due to material failure.
Why “Same Day” Wrapping Services Are a Red Flag
You can find suppliers in the market that offer a Same Day Wrap. Process engineering-wise, this assertion is questionable.
Assuming the minimum time taken to do the necessary steps:
- Decontamination & Wash: ~3 hours
- Disassembly: ~2 hours
- Application (Full Car): ~8-10 hours (a fast team)
- Reassembly: ~2 hours
- Post-Heating/Finishing: Approximately 2 hours.
These active labor hours are more than a normal working day. A shop will have to sacrifice the time requirements of Drying and Curing which are the passive ones in order to have a “Same Day” turnover.
When a car is returned right after the film is cut, the moisture (in the case of PPF) has not evaporated on the edges, and the adhesive (in the case of Vinyl) has not developed the initial bond strength. The driving vibration and the wind resistance on the highway will probably make the film lift on the edges in 48 hours. A Same Day service will frequently exchange 24 hours of in-store time with a service appointment in the future to repair lifting edges.
Post-Installation: Curing Time and First Week Care
The installation schedule technically will continue past the time the customer takes the keys. The bonding adhesive adheres to a curing curve.
The Curing Phase:
When the physical work is completed, the vehicle is supposed to be left in the temperature-controlled shop environment of the shop an extra 12-24 hours. This will enable the installers to perform a next day check to press down any edges that might have risen due to the relaxation of the film.
The Critical Window: The First 7 Days:
After the vehicle has been released, the adhesive is approximately 80 percent bond strength. The rest 20% is formed during the following week by exposure to UV light and thermal cycling.
- Limit: Do not wash the car within 7 days. The curing adhesive is sensitive to high-pressure water or harsh chemicals, which may lead to delamination.
- Environment: Preferably, the vehicle must be parked in the sun during the day to speed up the process of solar curing, to enable the film to settle on the surface.
DIY vs. Professional Shop: Realistic Time Expectations
Finally, for the enthusiast considering a Do-It-Yourself approach to save cost, it is imperative to have a realistic calculation of the time investment.
Professional Timeline:
- Duration: 3 to 5 days.
- Resource: Continuous work by 2 skilled technicians.
- Efficiency: Optimized via specialized tools, lifts, and environment.
DIY Timeline:
- Duration: 40 to 60 active labor hours.
- Real-world Implication: For a person with a full-time job, this translates to 3 to 4 consecutive weekends.
- Risk Factor: The fatigue curve. As the DIYer gets tired, mistakes increase. A mistake on a large panel (like a hood) means ripping off the material and starting over, doubling the time and material cost for that section.
Conclusion
The question of how long does it take to wrap a car does not have one fixed answer, but it has a range of calculated answers. The average high-quality commercial wrap will have a benchmark of 4 to 5 days. This time is required to allow the physics of adhesion and the mechanics of disassembly.
The quality in this particular field is usually the enemy of speed. Being a shop owner who wants to be efficient or a vehicle owner who wants to be protected, the most reasonable solution is to focus on the quality of the material, including the engineering of ClearPro films, and follow the required procedures of curing. The additional days spent in the shop are a small price to pay compared to the cost of failure on the road that is exponentially greater.