


Introduction
Tinting your car windows is not just about enhancing the aesthetics; it’s also a crucial measure to protect your vehicle. Nowadays, window tinting has become increasingly popular among car enthusiasts. By opting for a DIY window tint solution, you can add a personal touch to your vehicle while enjoying the satisfaction of completing the task yourself. But the real question is: How to tint car windows? The procedure is a bit lengthy and requires patience and expertise.
Understanding the basics of window tinting before you begin is essential for achieving the best results. This guide will walk you through the process of selecting the right window tint and provide step-by-step instructions to ensure that the tint is applied smoothly without any bubbles or wrinkles. Whether you’re new to DIY projects or have some experience, this guide will help you achieve a professional-quality finish.
The Basics of Window Tinting
Window tinting refers to the application of a thin film on the inside of your vehicle’s windows. This improves both its performance and aesthetics. Fundamentally, it is very simple: ordinarily, the tinted film is built from long-lasting polyester meant for blocking dangerous ultraviolet rays, lessening glare and enhancing privacy. To attach this film to the window, there is one side that has adhesive side.
Precise execution of window tinting calls for caution. You should have proper measurement as well as accuracy when applying the film to avoid creases that can affect its outcome. Still, it will also require a steady hand in its application.
Types of Window Tint Films Available
When it comes to DIY window tinting, you need to know the different types of window tint films available, that have unique benefits as stated below:
Dyed Window Tint:
This is the cheapest option and its popularity comes from its simplicity and effectiveness in terms of do-it-yourself enthusiasts. By placing a layer of dye between the adhesive layer and protective top coat on the inside of windows dyed film is made. It has good privacy features and reduces direct sunlight, though it has less UV protection. However, it still remain highly visible, thus making it an inexpensive method for improving privacy while maintaining visibility.
Metalized Window Tint:
These films contain minuscule metal particles that reflect heat and UV rays hence reducing fading as well as heat buildup in the car. Metalized films are more robust than dyed ones and they have a better resistance to scratches. They guarantee excellent clarity with a glossy look outside but might disrupt mobile phones or navigational units. For people who are concerned about reducing heat absorption into their vehicles and want increased seclusion, metalized films work best.
Carbon Window Tint:
Carbon film provides excellent UV protection that does not fade over time as dyed films do. It adds a matte finish to the vehicle’s appearance thereby blocking out around 40% of infrared light that causes heat resulting in cooler interiors. Carbon tint has great visibility too, making it an ideal choice overall.
Ceramic Window Tint:
Ceramic tints are considered premium because they offer maximum visibility and protection from both ultraviolet (UV) rays and infrared (IR) light rays among other things. Such films contain non-conductive ceramic particles. Ceramic tints offer superior visibility with absolutely no glare yet still efficiently reflect most of the sun’s heat without affecting electronic traces within your car if perfectly installed. For those who want maximum heat rejection and privacy, no other window tint is better than ceramic tint.
| Type of Film | UV Protection | Visibility | Heat Rejection | Signal Interference | Privacy Level |
| Dyed | Low | High | Moderate | ✗ | Moderate |
| Metalized | High | High | High | ✓ | High |
| Carbon | High | High | High | ✗ | High |
| Ceramic | Highest | Highest | Highest | ✗ | Highest |
Proper selection of window film and careful installation can greatly improve your car’s comfort, protect the inside from sunlight rays as well as provide more privacy. With the right kind of film and a painstaking application, one will have a beautiful finish that is also practical since it does not contain any bubbles.
Preparing for Your DIY Window Tint Project
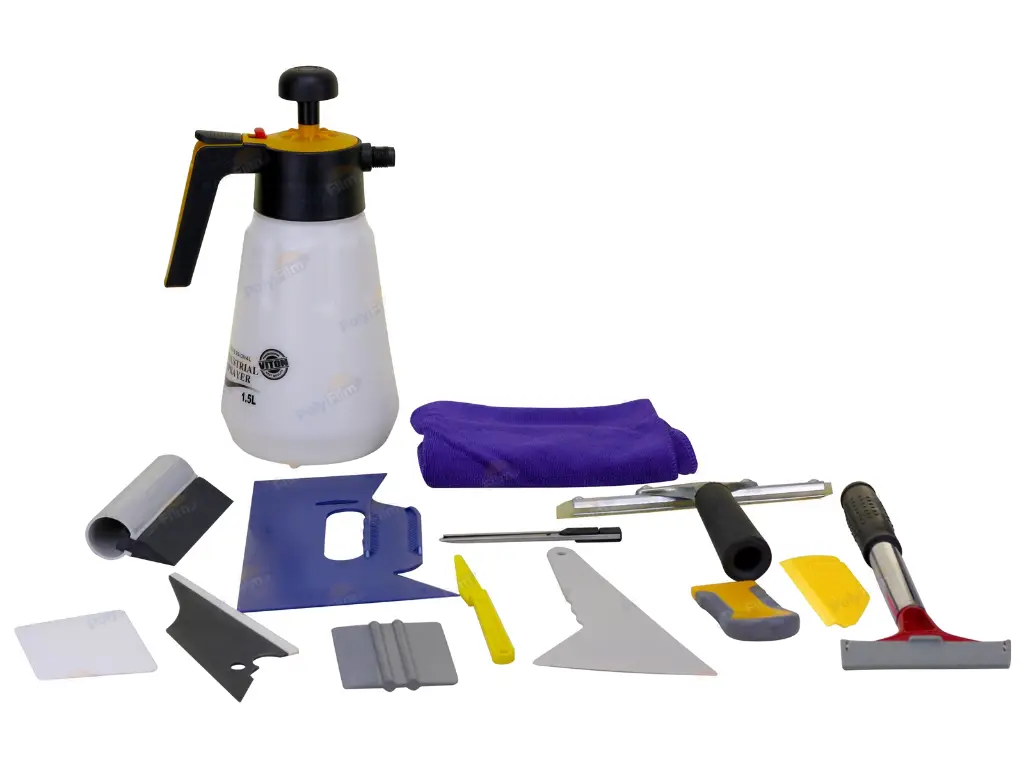
Tools and Materials
When starting a DIY window tinting project for your car, having the right tools and materials is crucial for achieving a professional result.
Before Tinting:
- Soapy Water Solution: Mix in a spray bottle with dish soap for cleaning windows.
- Microfiber Cloth: Used for cleaning the window surface to remove debris.
During Tinting:
- Tinting Squeegee: Smooths out the film and removes bubbles.
- Utility Knife: Cuts the film to precise dimensions.
- Heat Gun: Activates adhesive and shapes film to windows.
After Tinting:
- Edge Trimmer: Trims excess film for a clean edge.
- Detailing Towel: Polishes and finishes edges post-application.
Measuring Windows Correctly
Cutting window tint to fit the frame of your window properly requires precision in taking the actual measurements. Precisely taken measurements will prevent air bubbles, wrinkles and misalignment while installing the film. Start by measuring from the top edge to the bottom half to the edge inside the window and from the left edge over to the right side. Always add a few extra inches to each dimension for cutting allowance when you install it yourself. Paying attention to detail in your measurement can make or break a job that looks professional.
Remove Your Old Tint
Before applying a new layer of window tint to your car, it’s crucial to remove any existing tint to ensure the new application adheres smoothly and looks its best. Here’s how you can effectively remove the old window tint:
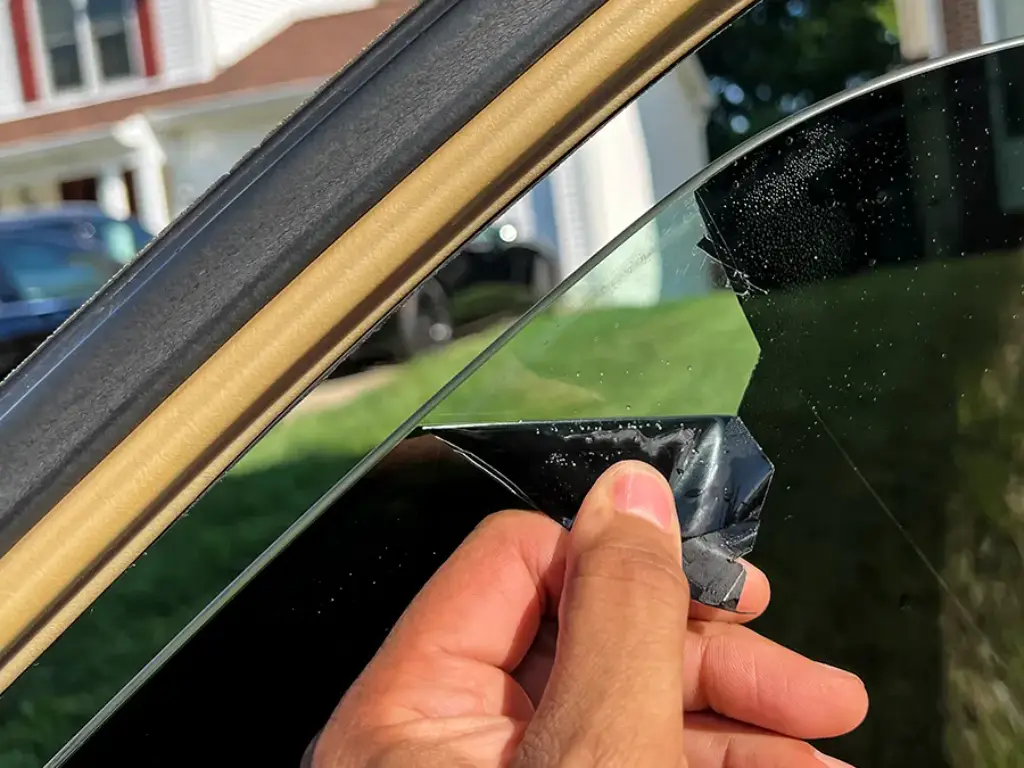
- Apply Heat: Use a hair dryer or heat gun to gently heat the old tint film. The heat will loosen the adhesive, making the film easier to peel off. Be sure to distribute the heat evenly to avoid damaging the window glass.
- Peel the Film: Start at a corner of the window and try to peel the film away by hand. If the film resists, apply more heat and try again. Aim to remove as much of the film as possible in large sections to minimize residue.
- Scrape Off Residue: Once most of the film is removed, use a razor blade or scraper to gently eliminate any remaining adhesive residue from the window. Take care to avoid scratching the glass.
- Clean the entire Window: After all the residue is removed, clean the window thoroughly with soapy water and a microfiber cloth. Ensure the window is completely clean and free from any debris or adhesive remnants.
- Final Inspection: Perform a final check to ensure all traces of the old tint are gone and the window is clear. This step is crucial to guarantee that the new tint will adhere properly and have a flawless appearance.
Step-by-Step Guide to Apply Your Window Tint Film
Step 1: Clearing Your Car Window
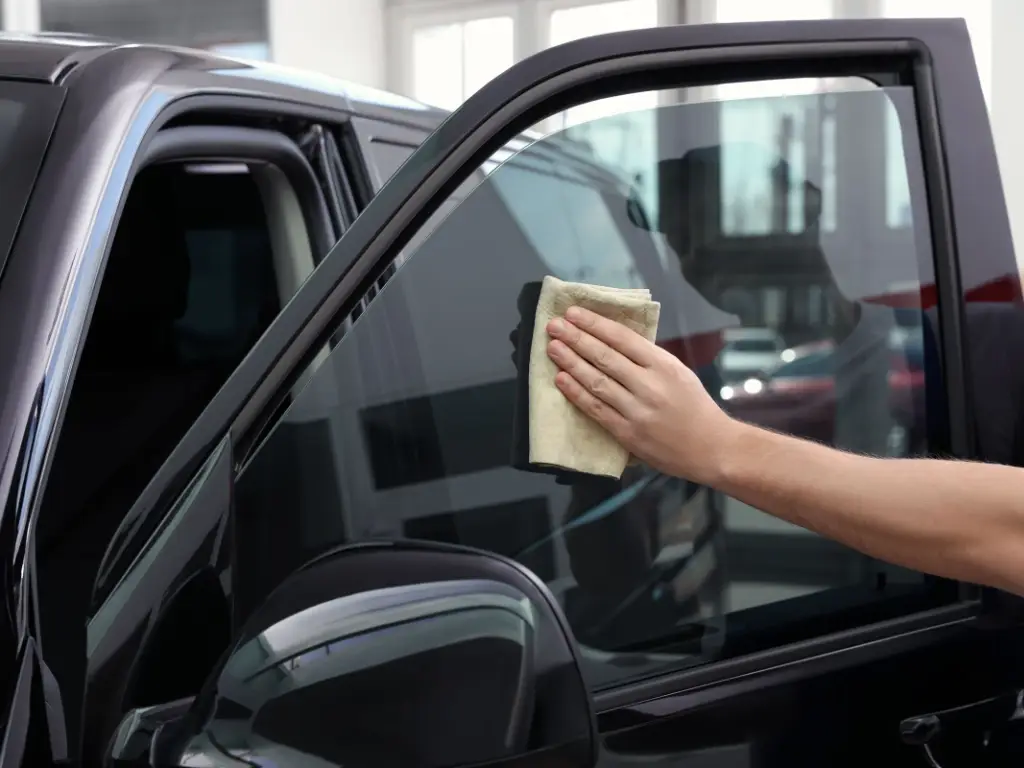
To start with, you have to ensure that the window of your car is entirely free from residues or contaminants before applying any tint. To clean your window thoroughly, use a clean microfiber cloth saturated in a mixture of soapy water. Take your time while cleaning it and do not forget to concentrate on the edges of the window because dirt normally gets trapped here. Making sure that this surface is spotless will help the film stick well without bubbles and give an outside appearance that is clear.
Step 2: How to Cut Window Tint to Size?
Cutting the window tint to correct size is a precise and detailed job. After measuring your window correctly, unroll the tinting film on a flat, clean surface. Cut slightly bigger than your measurements using a sharp blade on the film. This ensures it fully covers all sides of the window.
This can be trimmed later but never cut too short leaving gaps in between walls where you want to put up something else. In order to make accurate cuts when trimming out tinted films, safety equipment like sharp utility knives and straight edges are very important tools. A good cut-off line means getting rid of excesses after making an accurate measurement rather than cutting too short leading to spaces being left around the wall’s perimeter.
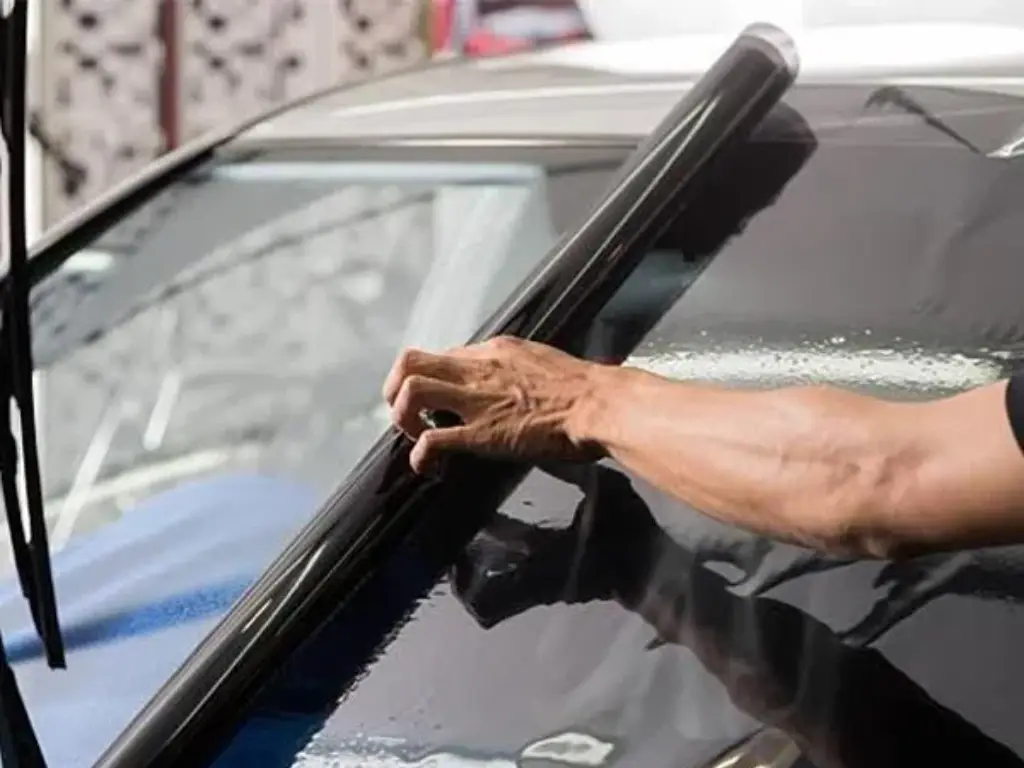
Step 3: Apply Window Tint
When applying window tint, start by spraying the inside of the window with a lot of soapy water. This soap acts as a lubricant for easy movement and placement of the tint.
Next, start removing the film’s backing. Start from the corners moving slowly downwards. Ensure that the top edge of the tint aligns with the topmost part of the window and it should be straight.
Put your film on with a squeegee as you place it in your window. Smoothen out all air bubbles from the middle to the edges to ensure good adhesion between glass and tinting material. You may have to do this step several times which means having a film that is completely smooth without any flaws.
Step 4: Smooth Out Bubbles and Wrinkles
Once you have placed the film on your windows, remove any bubbles and wrinkles that form in between them by starting at their center. Use a squeegee with a cloth wrapped around the hard edge to softly push bubbles toward the edges. When you see wrinkles or creases, lift up carefully one edge from where it comes closest. Put it back again, then apply some heat using a heat gun so as to soften the adhesive. This will make working with the film easier.
It is important not to rush during this process because rushing may cause tearing or permanent wrinkling in one corner.
Step 5: Trim the Edges for a Perfect Fit
The excess film must be removed following a smooth application for proper fitting. You can accurately cut using a sharp utility knife with something hard such as a ruler or tinting tool which is made specifically for this. The most important thing is to do the cutting in one long motion to avoid rough edges and tearing.

Balance is key when trimming. Applying too much force may result in glass scratches while applying insufficient effort leaves a film that has uneven edges. Give it one last run with the squeegee over the borders after trimming it. This guarantees that all of its parts are well fastened and there are no free ends left on it.
The Issue of Car Window Tinting and Possible Solutions
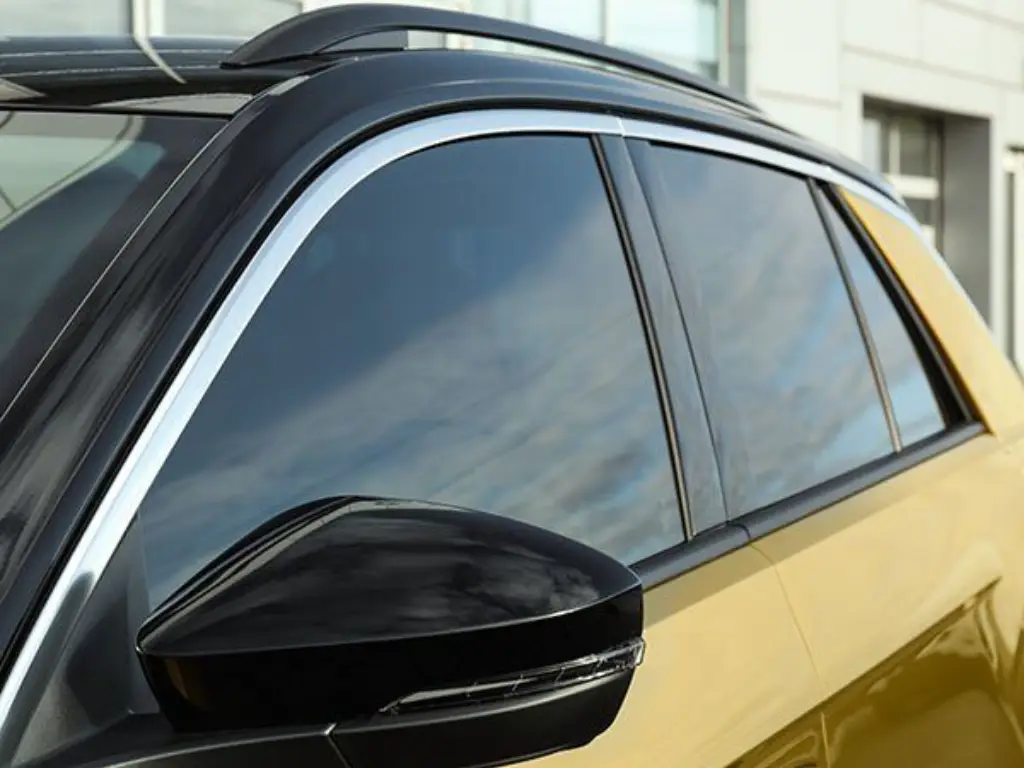
Side windows
Putting window tints on side windows often involves more trimming work, thus requiring one to align the edges at the top and bottom edge carefully. Make sure you cut perfectly and use appropriate tools for shaping your film over different window sizes or shapes. In order to produce professional-looking results, this is vital.
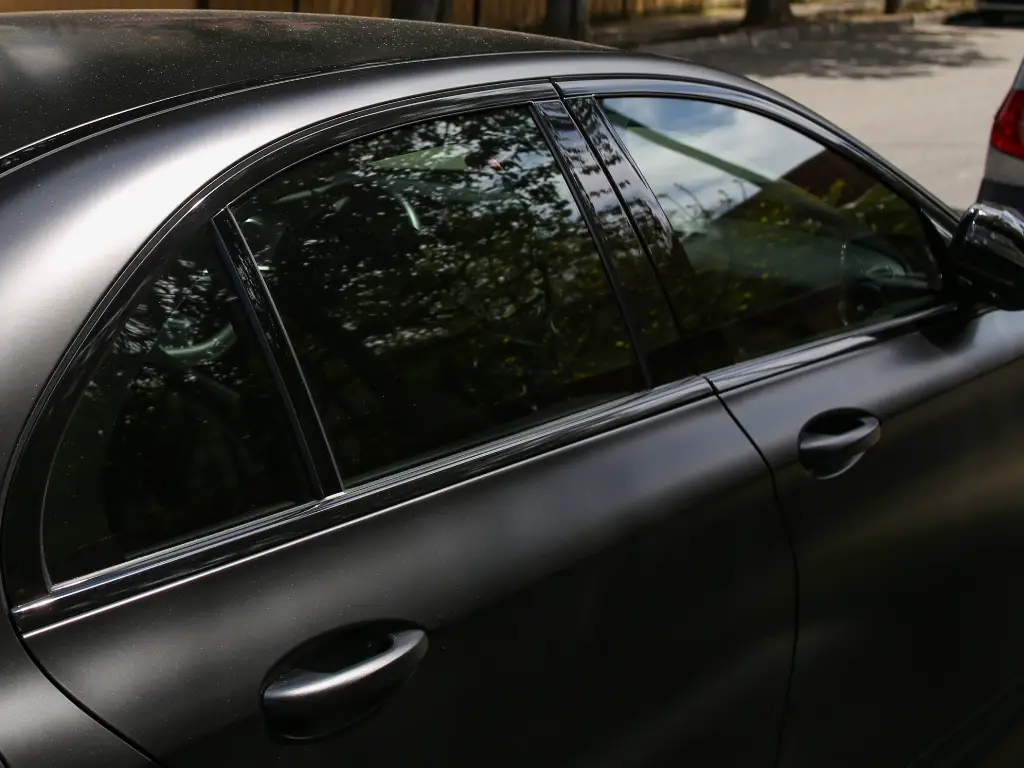
Back Window
There are challenges peculiar with tinting rear windows mainly because of their size and shape. Often times, these rear windows are larger than those in other parts of the vehicle and have curved surfaces, hence accurate application techniques are needed to avoid seams as well as air bubbles in it. The best method would be having one big enough piece of film that can cover all the window so that there will be no such things like seams which may compromise appearance and durability of the tint.
In addition, proper care must be taken when applying tint on the rear window defroster lines since the materials should not obstruct these lines thereby causing trapped air that might lead to peeling off or ineffectiveness during defrosting.
For persons who love do-it-yourself jobs, they could begin by trying first on smaller ones before tackling side or back windscreen. This is necessary for skill development with confidence building while reducing costly mistakes made in fixing things wrongly done as instructed above.
Conclusion
Embarking on a DIY window tint project can be a rewarding endeavor. It not only enhances the look of your car but also improves its functionality. Window tinting offers several benefits, such as protection against harmful UV rays, added privacy, and reduced interior heat. With the right tools, materials, and a bit of patience, you can achieve professional-quality results that are both aesthetically pleasing and highly functional.
Remember, the key to successful DIY window tinting lies in preparation and precision. Take the time to gather the correct supplies and understand the specifics of your vehicle’s windows. Practice makes perfect. With each window you work on, you’ll refine your techniques and learn more about the art and science of window tinting. Whether you’re a seasoned DIYer or a first-timer, the journey through the world of DIY window tinting is sure to be as rewarding as the final results.
ClearPro has become one of the leading brands in the automotive window tint market due to its innovative technologies and high-quality products. This is evident in the company’s line of sophisticated nanotechnology based tints that provide the best performance.